Have you ever wished that you could record the audio from a web browser, Skype call, or video game? Well, guess what, you can, and it’s not that hard! Rogue Amoeba’s Audio Hijack software allows you to capture audio from almost any source on your Mac and create custom signal processing chains.
Audio Hijack is a module based program that allows you to link together different inputs and outputs. You can introduce native audio effects into the signal chains you create, or use your own third-party effects. Recording audio from apps is perhaps one of Audio Hijack’s most basic functions; it offers up a whole variety of audio routing and processing options. I should also mention that this isn't a sponsored article; I truly think audio Hijack is one of the best audio routing and recording utilities available.
There are recording workarounds that don’t involve the use of paid software. You can route outputs on your audio interface to available inputs using TRS cables, or set up a virtual audio output/input device using a free program like Soundflower. These methods will allow you to record the audio inputs (analog or digital) that you’ve routed audio to, within your DAW. The reason I’m not a huge fan of these recording techniques is that they take a while to set up, and make recording audio a chore.
Recording Audio from An App
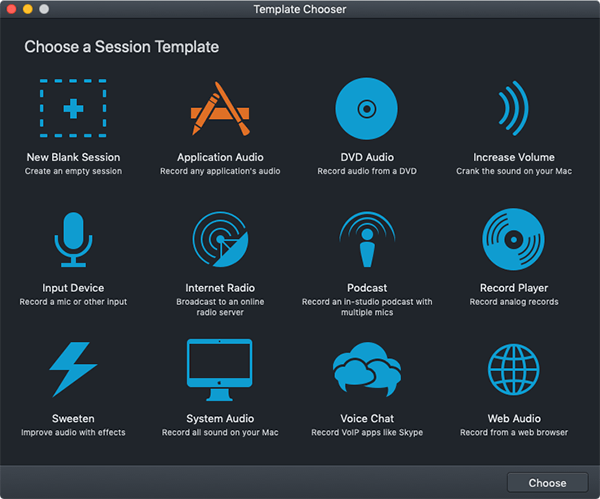
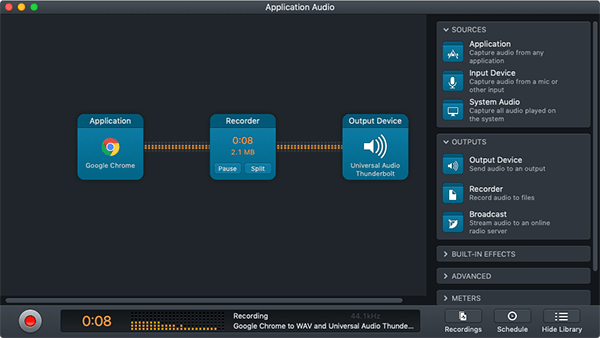
When you open up Audio Hijack, you’ll be presented with the Template Chooser menu. There’s even an Application Audio template that you can select. Recording audio from an app using Audio Hijack is a relatively straightforward process, but there are a couple settings you need to adjust to get everything up and running.
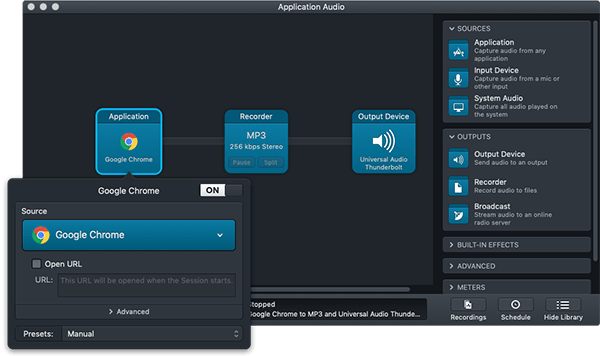
Loading the Application Audio preset will present you with three modules: Application, Recorder, and Output Device. The first module you need to address is the Application Source module; click on it and select the app that you want to record from the Source dropdown menu.
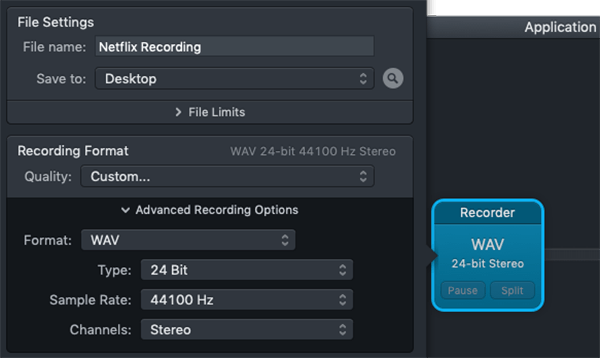
Clicking on the Recorder module will bring up a menu that allows you to manipulate File Settings, Recording Format, and Tags. Under File Settings, give your file a name and select an easily accessible save location, like your Desktop.
You need to create a custom recording format to ensure you capture audio in a high quality format. Click on Advanced Recording Options, and select WAV as your Format. Additionally, you should set the bit depth (Type) to 24 Bit. I record most audio with my Sample Rate set to 44100 Hz, but this value is somewhat dependent on what you plan to do with the audio file you record.
Setting tags is optional since you can add them in iTunes once you’ve captured the recording, but if you want to fill them out now, you can.
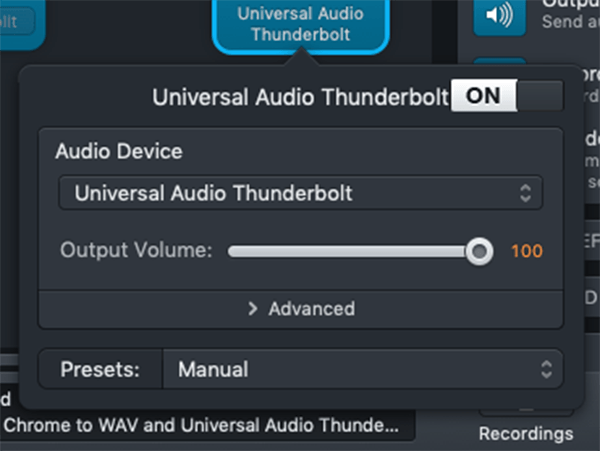
To audition the audio you're running through Audio Hijack, click on the Output Device module and select your audio interface from the Audio Device dropdown menu.
Start recording the app you’ve selected by clicking on the red button in the bottom left corner of Audio Hijack. When you’re ready to stop the recording, click the record button once again.
The file you record will appear in the destination you selected from the File Settings menu in the Recorder module.
Processing Audio From an App
Audio Hijack allows you to do much more than merely record audio from different apps. It comes with its own audio effects, and sound restoration tools like Declick, Dehum, and Denoise. These devices work rather well and can apply different types of basic audio processing.
Audio Hijack’s sidebar menu is broken down into different device categories. The first two menus include different sources and outputs that you can choose from. The other menus contain various different effects that you can apply between your source modules and output modules.
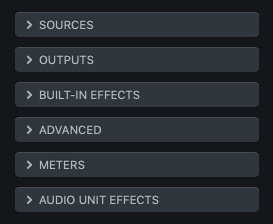
You can click and drag modules from the dropdown menus into the workspace area. Audio effects can be linked together either in serial or parallel with one another, which creates a massive array of routing possibilities. You can use third-party audio unit effects within Audio Hijack, which further enhances its usefulness.
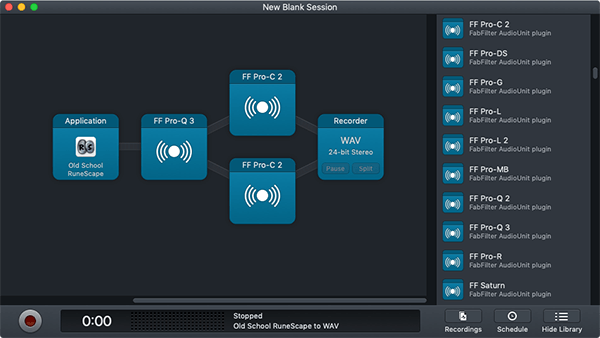
When watching Netflix in a noisy environment, such as a living room with a fan, it’s tough to hear the quieter parts of a dynamic audio track. Any audio that falls below the level of the noise floor (the sound produced by the fan) becomes inaudible. To hear the softer parts of a movie, you need to turn the volume up. This may not seem like an issue, but it causes the loud parts of a movie to become too loud. Having to continually change the volume of the movie you’re watching creates a very unpleasant listening experience.
Luckily, there’s a solution to this problem. Audio Hijack allows you to process app audio in real-time, meaning you can apply a limiter to the web browser that you’re watching Netflix in. This will allow you to reduce the dynamic range of the movie you’re watching. You can set this up by selecting the web browser you’re using as the application audio source, followed by a limiter like the FabFilter Pro-L2. Finally, add an Output Device module and select your audio interface at the Audio Device.

Audio Hijack is perfect for recording application audio and offers music producers the ability to rip samples from just about anywhere. It’s an essential utility app that I find myself using frequently. This software is priced at $59, which I think is quite reasonable considering the number of routing, recording, and processing capabilities that it provides.


